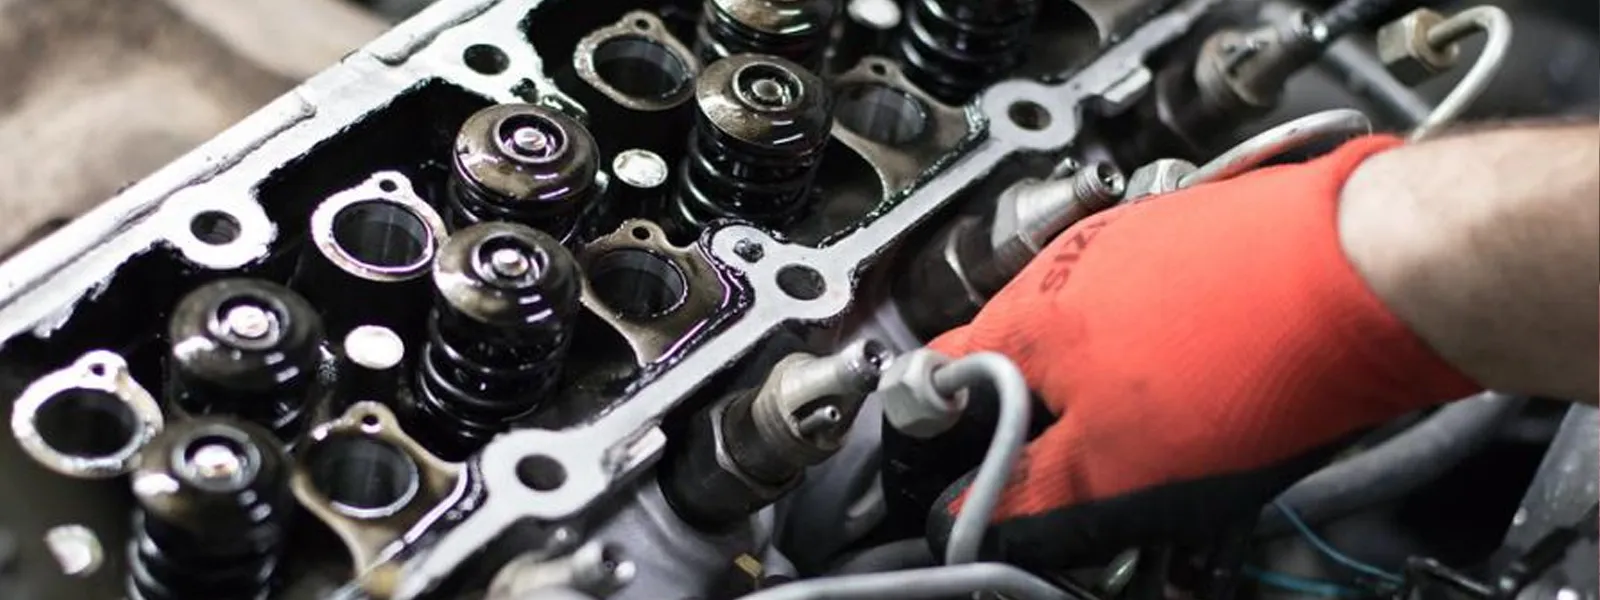
Error P0303 is a diagnostic trouble code (DTC) under the OBD-II standard that indicates misfires in the engine’s third cylinder. When the PCM detects this code, uneven combustion or complete failure of the air-fuel mixture to ignite is occurring in cylinder number 3.
The powertrain control module identifies the misfire by monitoring changes in crankshaft rotational speed: the crankshaft position sensor sends signals about instantaneous angular velocity, and the PCM analyzes acceleration during each power stroke. If during cylinder 3’s stroke the crankshaft slows down instead of accelerating due to combustion, the PCM registers a misfire. Once the number of misfires exceeds a threshold—usually within several monitoring cycles—the PCM stores code P0303 and illuminates the Check Engine light.
Causes of misfires may relate to the ignition system (coil, spark plug), fuel delivery (injector, fuel pressure), mechanical engine condition (compression, valves), or electronic components (crankshaft sensor, wiring). Ignoring the issue is dangerous: unburned fuel enters the exhaust system, overheating and damaging the catalytic converter, leading to costly repairs. Burnt valves, oil dilution, and piston ring damage are also possible.
Page contents
What to do right now: a brief action plan
If your Check Engine light comes on with code P0303, follow this plan:
- If the indicator is flashing—stop immediately and turn off the engine. This signals severe misfires that can damage the catalytic converter. Call a tow truck.
- If the indicator is steady—you may drive to a repair shop at low speed for a short distance (no more than 3–6 miles (5–10 km)), avoiding hard acceleration and high RPM.
- Read trouble codes—connect an OBD-II scanner (ELM327 with Torque or Car Scanner app) and record freeze-frame data: engine RPM, load, coolant temperature at the time of the code.
- Check the coil and spark plug of cylinder 3 by swapping them with those of an adjacent cylinder. If after clearing the code the code shifts to P0301 or P0302, the swapped part is faulty.
- Inspect the injector—if coil and plug are fine, listen to the injector with a stethoscope or check fuel trims (STFT/LTFT) via scanner.
- Measure compression—if previous steps reveal no issue, the cause may be mechanical (worn rings, burnt valve, blown head gasket).
- Do not delay repairs—continuing to drive with misfires can destroy the catalytic converter (often a major expense) and damage the engine.
Do not drive with a flashing Check Engine light! This indicates severe misfires that are dangerous to the catalytic converter. Stop and call a tow truck.
Main symptoms of error P0303
Misfires in the third cylinder show up with characteristic signs noticed by the driver immediately or gradually:
- Check Engine light steady or flashing—minor misfires cause a steady light; severe misfires cause flashing, requiring an immediate stop.
- Engine roughness—vibrations felt in the body and steering, especially at idle and takeoff. Physically, cylinder 3 fails to produce power, causing crankshaft torque imbalance.
- Loss of power and sluggish acceleration—cylinder 3 does not contribute to overall output, causing delayed throttle response and possible jerks under load. On a 4-cylinder engine, this can cause a noticeable power drop.
- Unstable idle—RPM fluctuates, and the engine may stall at traffic lights or when the A/C is on. Uneven cylinder operation disrupts RPM balance.
- Increased fuel consumption—some fuel remains unburned and passes into the exhaust.
- Fuel smell from the exhaust—unburned fuel exits with exhaust gases; backfires may occur as the mixture ignites in the exhaust system.
These symptoms may appear individually or combined. Severity depends on the misfire cause and operating conditions (idle, load, cold or warm engine).
Is it dangerous to drive with error P0303?
Driving with code P0303 involves serious risks to the engine and exhaust system. Here is what happens if you continue driving:
Overheating and destruction of the catalytic converter. Unburned fuel from cylinder 3 enters the exhaust manifold, igniting upon contact with hot gases from adjacent cylinders. This raises the catalytic converter’s temperature beyond design limits, melting and fusing the ceramic honeycomb. Replacement cost varies widely by vehicle and region; in many cases it can range from hundreds to a few thousand US dollars depending on make and model.
Engine damage. Prolonged misfires can cause burnt exhaust valves (local overheating from unburned mixture) and fuel entering the crankcase, diluting engine oil (reducing lubrication and accelerating wear of piston rings and crankshaft bearings). In severe cases, piston damage in cylinder 3 is possible.
Increased repair costs. The initial cause (for example, a faulty ignition coil that is relatively inexpensive) can escalate into a complex failure requiring catalytic converter, valve, and ring repairs.
When a short trip is acceptable:
If the Check Engine light is steady (not flashing), vibrations are moderate, and no significant power loss occurs, you may drive to a repair shop at low speed, avoiding hard acceleration. Limit distance to 3–6 miles (5–10 km).
When a tow truck is required:
If the Check Engine light is flashing, driving is prohibited—this signals critical misfires. Stop, turn off the engine, and call a tow truck.
Information is general and does not replace professional consultation. If symptoms appear, contact a certified repair facility for diagnostics.
Main causes of code P0303
Misfires in cylinder 3 are caused by faults in various systems. Below are causes ranked by likelihood—start diagnostics with the first items to save time and cost.
| Cause | Likelihood | Difficulty of check |
|---|---|---|
| Faulty spark plug or ignition coil | High | Easy |
| Clogged or faulty injector | Medium | Medium |
| Low compression (worn rings, valves) | Low | Hard |
| Sensor or wiring issues | Medium | Easy |
| Intake air leak | Low | Medium |
This table helps form an action plan and prioritize component checks.
Ignition system issues: spark plug, coil, wiring
The ignition system of cylinder 3 is the most common cause of P0303. A faulty ignition coil or worn spark plug fails to generate sufficient spark to ignite the mixture.
Ignition coils fail due to overheating, vibration, or insulation breakdown. On engines with coil-on-plug (COP) systems, breakdown may be visible as cracks on the coil housing or oil in the spark plug well, which conducts current to ground instead of to the spark plug electrode.
Spark plugs wear naturally: gap increases, the center electrode accumulates deposits, and the insulator cracks. A larger gap requires higher voltage to spark, and a weakened coil cannot keep up—the spark disappears under load.
High-voltage wires (on older engines without COP) lose insulation integrity: microcracks leak current to ground, especially in humid conditions.
Diagnostic method by swapping:
Swap the coil or spark plug of cylinder 3 with an adjacent cylinder (e.g., 1 or 2). Clear code P0303 with a scanner, then drive 3–6 miles (5–10 km). If the code shifts to P0301 or P0302, the swapped part is faulty. If P0303 remains, the problem lies elsewhere in cylinder 3 (injector, compression, wiring).
What to do:
Inspect the spark plug well for oil or water (sign of a valve cover gasket leak). Check spark plug gap with a feeler gauge, and inspect electrode and insulator condition. Replace the spark plug and/or coil. If oil is present, fix the leak before installing a new coil.
Fuel system faults: injector and fuel supply
The injector for cylinder 3 may clog or stick, disrupting fuel metering. When clogged, the injector sprays insufficient fuel—resulting in a lean mixture that ignites poorly. When stuck open, the mixture is overly rich, flooding the spark plug and preventing ignition.
Non-removal check methods:
- Automotive stethoscope—listen to the running injector: a healthy injector produces clear clicks at a frequency proportional to engine RPM. A dull or absent sound indicates a problem.
- Cylinder balance test—advanced scanners with live data allow sequential injector shutdown at idle. Disabling a working cylinder causes RPM drop; if disabling injector 3 does not change RPM, it is not delivering fuel or the cylinder is inactive.
- Fuel trim monitoring (STFT/LTFT)—if short-term and long-term fuel trims for the bank with cylinder 3 are strongly positive, the PCM is compensating for a lean condition, which may indicate a clogged injector or low rail pressure.
Fuel pressure check:
Connect a pressure gauge to the fuel rail (if equipped with a test port) and measure pressure at idle and under load. Normal values depend on your vehicle’s fuel system—refer to the service manual.
What to do:
If confirmed, perform ultrasonic injector cleaning or replacement. Check sealing rings on the rail for leaks. Replace the fuel filter if pressure is low, where applicable.
Mechanical engine faults: low compression
If compression in cylinder 3 is below normal compared to others, the mixture does not compress to the temperature and pressure needed for stable ignition. Misfires occur even with a good spark plug and coil.
Causes of low compression:
- Worn piston rings—rings lose elasticity, fail to seal cylinder walls, allowing gases to leak into the crankcase.
- Burnt valve—exhaust or intake valve does not seal properly due to overheating or deposits.
- Blown head gasket—leak between the cylinder and a coolant passage, causing compression loss into the cooling system (bubbles in the coolant reservoir) or vice versa.
- Cylinder wall wear—scoring, out-of-round condition.
Diagnostics:
- Compression measurement with a gauge—remove the spark plug from cylinder 3, screw in the gauge, and crank the engine for 4–5 seconds with the throttle held wide open. Record the reading and repeat for other cylinders. Refer to your model’s service manual for normal values. The difference between cylinders should not exceed specified limits.
- Leak-down test—introduce compressed air into cylinder 3 through the spark plug hole at top dead center of the compression stroke. Measure leakage percentage. Listen for escaping air:
- From the oil filler cap or crankcase breather—leak through rings.
- From the exhaust pipe—exhaust valve leak.
- From the intake manifold—intake valve leak.
- From the coolant reservoir or an adjacent cylinder—blown head gasket.
What to do:
If a mechanical fault is confirmed, engine disassembly is required: valve lapping/replacement, ring replacement, cylinder boring, or head gasket replacement. Also check cam timing—a jumped belt or chain can disrupt valve timing.
Electronic faults: PCM, sensors, and wiring
Less commonly, P0303 may be caused by electronic issues related to ignition and injection control of cylinder 3.
Synchronization sensors:
Crankshaft position sensor (CKP)—if the signal contains noise or missing pulses, the PCM misinterprets cylinder 3 piston position and fires spark/injection out of sync. Resistance of a good inductive CKP sensor varies by model (check your engine’s wiring diagram), and it generates AC voltage when cranking.
Camshaft position sensor (CMP)—determines phase (which cylinder is on the compression stroke). Failure can cause the PCM to confuse cylinders or enter fail-safe mode. Hall sensor power is usually 5 V; check your model’s wiring diagram.
Wiring and grounds:
Breaks or high resistance in coil/injector control circuits for cylinder 3 cause weak spark or no injection. Oxidized connector contacts, worn insulation, and poor ground contact are common issues.
PCM:
Software faults are rare but possible after failed reflashing or physical damage (moisture, overheating).
What to check:
- Crankshaft sensor resistance with a multimeter (refer to the manual).
- Camshaft sensor supply voltage.
- Continuity of wiring from the PCM to the coil/injector of cylinder 3 (check for breaks/shorts).
- Quality of the engine-to-chassis ground connection.
- Oscilloscope waveform of sensor signals (if available)—pulse shape, absence of dropouts.
What to do:
Fix wiring breaks, clean contacts, and replace the faulty sensor. If the PCM is suspected, perform diagnostics on a specialized bench or update software only at a certified repair facility.
| Component | Test parameter | Note |
|---|---|---|
| Crankshaft sensor (CKP) | Resistance/voltage | See your model’s manual |
| Camshaft sensor (CMP) | Supply voltage | Usually 5 V for Hall sensor; check manual |
| Ignition coil | Coil resistance | Model-dependent; see specs |
| Injector | Resistance | Depends on type; see manual |
Other possible factors (less common)
Besides the main systems, P0303 may be caused by less obvious reasons:
- Localized air leak—a crack in the intake manifold gasket near cylinder 3 leans out only that cylinder’s mixture.
- Flooded spark plug well—after engine washing, water or oil enters the well, causing coil current leakage to ground.
- Poor-quality fuel—high ethanol content (E85 in a regular gasoline vehicle) or water in the gasoline can reduce combustion stability.
- EGR valve stuck open—recirculates inert gases mainly into one cylinder (if manifold geometry is uneven), worsening combustion.
How to identify cylinder 3 and firing order
Before swapping coils or plugs, it is important to accurately identify cylinder 3 location. Numbering depends on engine layout.
Inline 4-cylinder engines (I4):
Numbering usually runs from the timing belt/chain side to the flywheel. Viewed from the front (bumper side):
- Cylinder 1 is closest to the timing belt (often passenger side on front-wheel-drive vehicles).
- Cylinders 2, 3, 4 follow sequentially toward the flywheel.
V6 and V8 engines:
Two cylinder banks. Numbering depends on manufacturer:
- American V8s (e.g., GM LS): numbering 1-3-5-7 (left bank from the driver’s seat) and 2-4-6-8 (right bank). Cylinder 1 is usually front left.
- European V6/V8: numbering may differ, e.g., 1-2-3 (left bank) and 4-5-6 (right bank).
Always consult your vehicle’s service information or under-hood diagram.
Firing order:
This is the sequence in which cylinders perform power strokes. For many inline fours, it is 1-3-4-2. Knowing the firing order helps diagnose: if misfires occur every other stroke after cylinder 1, the problem may be in a shared system (e.g., one coil for two cylinders in DIS systems).
Practical tip:
Mark coils/plugs with a marker before removal to avoid confusion. Photograph the engine bay before starting work.
Step-by-step DIY diagnosis of error P0303
Diagnosing P0303 should proceed from simple to complex. The goal is to confirm the cause before replacing parts to avoid unnecessary expense.
Step 1. Connect scanner and read codes
Use an OBD-II scanner (e.g., ELM327 adapter with Torque or Car Scanner). Read active and stored codes. Record freeze-frame data showing conditions when P0303 occurred: engine RPM, load, coolant temperature, throttle position. This helps reproduce conditions during the test drive.
Check cylinder misfire counters in Mode $06 (if supported): this shows misfire counts per cylinder over the last 200 crankshaft revolutions. If cylinder 3 stands out significantly, the problem is localized.
Step 2. Visual inspection
Open the hood, inspect the spark plug well of cylinder 3 (see “How to identify cylinder 3”). Check:
- Presence of oil or water in the well.
- Condition of the coil connector (oxidation, cracks).
- Integrity of high-voltage wires (if present).
- Signs of coil insulation breakdown (white/black tracks on housing).
Remove the spark plug from cylinder 3. Check gap (refer to your model’s manual), electrode color (light brown is normal, black soot indicates a rich mixture or oil, white indicates a lean mixture or overheating), and insulator condition (no cracks allowed).
Step 3. Coil/plug swapping test
Swap the ignition coil of cylinder 3 with an adjacent cylinder (e.g., 1). Clear code P0303 with a scanner. Drive 3–6 miles (5–10 km) under conditions when the code usually appears (per freeze-frame data). Read codes again.
- If P0301 (or the code for the swapped cylinder) appears—the coil is faulty.
- If P0303 remains—the coil is not the cause; test the spark plug similarly.
Similarly for the spark plug: swap plug 3 with another cylinder, clear the code, test drive, and check codes.
Step 4. Injector check
If the spark plug and coil are good, diagnose the fuel system:
- Listen to the injector with a stethoscope on a running engine (idle). Clear clicks are normal.
- Use a scanner with live data to disable injector 3 programmatically (feature in advanced scanners). RPM should drop. If not, the injector is not working or the cylinder is inactive.
- Check fuel trims (STFT/LTFT). Strong positive trims indicate fuel shortage.
Measure fuel pressure with a gauge connected to the rail test port. Normal values are in the manual.
Step 5. Compression measurement
If previous steps show no problem, measure compression:
- Remove spark plugs from all cylinders.
- Install a compression gauge in cylinder 3.
- Have an assistant crank the engine for 4–5 seconds with the throttle held wide open (floor the accelerator).
- Record readings.
- Repeat for other cylinders.
Compare results. Differences exceeding manual thresholds require a leak-down test to pinpoint the cause.
Summary: after completing all steps, you will clearly identify the faulty component. Only then proceed to repair.
Advanced OBD diagnostics: what to look for in data
For in-depth analysis of P0303, use advanced scanner features. These parameters help distinguish primary faults from secondary symptoms.
Mode $06—monitor test results
This mode shows PCM self-diagnostic results for emissions-related components. For misfires, check:
- Misfire counters per cylinder—number of misfire events per cylinder over the last 200 crankshaft revolutions. If cylinder 3’s count is significantly higher (e.g., 15 vs. 0–2 others), the problem is localized.
- Threshold values (Test Limit)—the PCM sets a threshold above which the code is triggered. If the actual value is near the threshold but the code is not active, a problem is developing.
STFT and LTFT—short-term and long-term fuel trims
Short-Term Fuel Trim (STFT) and Long-Term Fuel Trim (LTFT) indicate how much the PCM adjusts fuel delivery relative to the base map, expressed in percentages:
- STFT—instantaneous correction (updates every few seconds).
- LTFT—accumulated correction over a longer period.
Typical thresholds depend on your model.
- Positive values—the PCM adds fuel to compensate for a lean mixture. Possible causes: clogged injector, air leak, low fuel pressure.
- Negative values—the PCM reduces fuel due to a rich mixture. Possible causes: stuck injector, faulty pressure regulator.
If STFT/LTFT for the bank containing cylinder 3 differ sharply from the other bank (in V engines), the problem is localized to that bank.
Oxygen sensors (O2/AFR)
Analyze oxygen sensor signal transitions:
- Pre-catalyst sensor voltage should oscillate between about 0.1 V (lean) and 0.9 V (rich) at 1–2 Hz (reference values vary by model). A frozen signal indicates sensor failure or mixture problem.
- Post-catalyst sensor voltage should be stable without rapid transitions (the catalyst smooths fluctuations). If the post-cat sensor mimics pre-cat transitions, the catalyst is damaged.
With misfires in cylinder 3, unburned fuel enters the exhaust, causing short-term mixture enrichment visible on oxygen sensor graphs.
CKP/CMP timing diagram (sensor oscilloscope)
If you have an oscilloscope or advanced scanner with graphing, check:
- Crankshaft sensor signal—should be clean without dropouts or extra pulses. Missing pulses indicate a damaged crankshaft reluctor or sensor failure.
- Camshaft sensor signal—should synchronize with the crankshaft according to timing. Desynchronization indicates a jumped belt/chain.
Freeze-frame data
A snapshot of engine parameters at the moment P0303 was recorded, including:
- Engine RPM
- Engine load (%)
- Coolant temperature (°F/°C)
- Throttle position (%)
- Vehicle speed (mph/km/h)
Freeze-frame helps reproduce conditions: if the code occurred at specific RPM and load, test the vehicle under those conditions.
| PID (parameter) | Note |
|---|---|
| STFT (Bank 1/2) | Thresholds depend on model |
| LTFT (Bank 1/2) | Same as STFT |
| Misfire Cylinder 3 (Mode $06) | Normal values depend on model |
| O2 Sensor 1 (pre-cat) | Reference values depend on model |
| Fuel Pressure | Normal depends on model; see manual |
How to fix error P0303: solutions
After diagnostics, proceed to fix the specific cause. Below is a table “cause → check → solution → approximate cost.”
| Cause | How to check | What to do | Approximate cost (USA, 2026) | Time |
|---|---|---|---|---|
| Worn spark plug | Gap, deposits, spark | Replace spark plug set | $50–150 | 30–60 min |
| Coil insulation breakdown | P0303 shifts after swapping | Install new coil, check well | $80–250 | 20–40 min |
| Clogged injector | Balance test, STFT, sound | Ultrasonic cleaning or replacement | $100–400 | 2–4 hours |
| Low compression | Compression, leak-down | Cylinder head/engine repair | $800–3000+ | 1–3 days |
| Crankshaft sensor fault | Resistance, oscilloscope | Replace sensor, check wiring | $50–200 | 1–2 hours |
| Damaged wiring | Break/short | Repair wiring, clean contacts | $50–150 | 1–3 hours |
Notes:
Costs are approximate and depend on vehicle model, parts availability, and local labor rates. Dealership pricing is often higher than independent shops.
Fixing the fault and clearing the Check Engine code
After replacing or repairing a component (spark plug, coil, injector, etc.), perform the following:
- Clear the code with a scanner—connect an OBD-II scanner, select the “Clear DTC” menu. This removes P0303 from active memory and turns off the Check Engine light. Alternatively, disconnect the battery for 10–15 minutes, but this resets radio and onboard computer settings. A scanner is preferred.
- Test drive—drive in various modes: idle, smooth acceleration, load driving (e.g., uphill or accelerating). Reproduce freeze-frame conditions when P0303 appeared.
- Read codes again—after the test drive, reconnect the scanner and check for codes. If P0303 does not return and misfire counters in Mode $06 are zero or minimal, the repair was successful.
- Monitor Misfire readiness—check the “Misfire” monitor status in the scanner’s readiness monitors. It should reach “Ready” after several drive cycles (OBD-II systems may require multiple warm-up cycles before monitors complete). This confirms PCM self-diagnostics completed without misfires.
Important: if the Check Engine light comes on again immediately or after a few miles, the cause is not fully resolved. Possible reasons:
- Wrong part replaced (e.g., spark plug changed but coil was faulty).
- Associated fault not fixed (e.g., oil in the well continues to damage the new coil).
- Second independent cause exists (e.g., clogged injector with a faulty spark plug).
In such cases, repeat diagnostics considering new data.
Strictly prohibited:
Continuing to drive with a flashing Check Engine light after a “successful” repair. Flashing indicates critical misfires remain.
P0303 specifics on popular cars
Different makes and models have typical “weak spots” that often cause P0303.
Common budget/compact gasoline engines (8v/16v)
Typical causes:
High-voltage wires (on models with distributor ignition) lose insulation and short to ground, especially in humid weather. Spark plug wells accumulate oil due to valve cover gasket wear—oil conducts current, causing coil breakdown. Modular ignition coils (on 16-valve engines) often fail due to overheating.
Quick checks:
Inspect wells for oil. Test HV wires with a multimeter (resistance per specs). Coil swapping method gives quick results.
Ford (Duratec/EcoBoost)
Typical causes:
COP coils are moisture-sensitive—after engine bay washing or driving through deep puddles, water enters connectors causing misfires. EcoBoost engines tend to have intake manifold air leaks (plastic manifolds crack at mounting points).
Quick checks:
Check coil connector sealing (apply dielectric grease). Perform a smoke test on the intake manifold to detect leaks. On EcoBoost, inspect the turbo and intercooler for oil (sign of turbo wear, indirectly affecting mixture formation).
Renault/Nissan (K4M/H4M)
Typical causes:
Sagem/Hitachi injectors clog with low-quality fuel. Individual coils have thin insulation and may fail after high mileage. Cylinder numbering on K4M is left to right from the timing belt side: 1-2-3-4.
Quick checks:
Ultrasonic injector cleaning after 50,000–60,000 miles (80,000 km). Coil swapping test. Inspect injector connectors for oxidation.
Kia/Hyundai (Gamma/Theta)
Typical causes:
COP coils tend to develop insulation breakdown from overheating (especially on GDI engines due to hotter combustion chambers). GDI engines accumulate deposits on intake valves (no fuel washing as in MPI), worsening cylinder filling and causing misfires.
Quick checks:
Coil swapping test. For GDI, borescope inspection of intake valves through available access points or manifold removal for media blasting/walnut shell cleaning.
Volkswagen/Audi (TSI/TFSI)
Typical checks:
Inspect intake valves for deposits (GDI) with a borescope. Perform a smoke test on the intake for air leaks.
Toyota (various models)
Typical checks:
Coil swapping test. Inspect connectors for oxidation.
BMW/Mini (N-series engines)
Typical checks:
Coil swapping test. Inspect intake manifold for cracks (plastic manifolds).
Subaru (boxer engines)
Typical checks:
Coil swapping test. Perform leak-down test to detect valve/ring issues.
| Make/Engine | Typical quick check signs |
|---|---|
| VAZ/LADA (8v/16v) | Inspect wells, test HV wires, coil swapping |
| Ford Duratec/EcoBoost | Seal connectors, smoke test manifold |
| Renault/Nissan K4M/H4M | Ultrasonic injector cleaning, coil swapping |
| Kia/Hyundai Gamma/Theta | Coil swapping, valve borescope inspection/cleaning (GDI) |
| VW/Audi TSI/TFSI | Valve borescope inspection, intake smoke test |
| Toyota | Coil swapping, connector inspection |
| BMW/Mini | Coil swapping, manifold inspection |
| Subaru | Coil swapping, leak-down test |
Common diagnostic mistakes
These errors slow down fault finding and increase costs:
- “Trial and error” method—mass replacement without confirmed diagnosis. Owner replaces spark plugs, coils, and injectors in sequence hoping to guess. Result: wasted money on unnecessary parts while the real cause (e.g., low compression) remains.
Correct approach: follow diagnostic steps (scanner → inspection → swapping → compression measurement), confirm cause before replacement. - Ignoring compression measurement and timing check. With mechanical faults (worn rings, burnt valve, jumped timing), replacing plugs and coils yields no result.
Correct approach: if simple checks find nothing, measure compression and verify timing marks. - Incorrect cylinder numbering during swapping. Mixing up numbers leads the owner to conclude “coil is fine” while actually swapping in the same cylinder.
Correct approach: consult the numbering diagram in the manual, mark coils/plugs before removal. - Skipping ground and connector checks. Oxidized engine ground or coil connector causes symptoms identical to a faulty coil but does not require part replacement.
Correct approach: clean grounds, apply dielectric grease, and check wiring resistance. - Neglecting moisture protection. After engine bay washing, water enters wells or connectors causing misfires. Owner replaces coil, but the code returns after the next wash.
Correct approach: dry wells with compressed air, apply dielectric grease to connectors, and install protective covers on coils if available.
Prevention and maintenance
Preventing misfires is easier than fixing the consequences. Follow these recommendations:
- Replace spark plugs per schedule. For most gasoline engines, see your model’s manual (usually every 18,000–37,000 miles (30,000–60,000 km) for standard plugs; iridium/platinum up to 62,000 miles (100,000 km), but check condition every 18,000 miles (30,000 km)). Check gap at every oil change—an increased gap requires replacement (specs in the manual).
- Use quality fuel and replace the fuel filter on time. Refuel at trusted stations, avoid lower-octane grades than specified. Replace the fuel filter every 12,000–25,000 miles (20,000–40,000 km) where applicable. Add injector cleaner annually if appropriate for your vehicle.
- Check intake seals and the PCV system. Intake manifold and throttle body gaskets harden over time, causing air leaks. A clogged PCV valve creates excess crankcase pressure, pushing oil into spark plug wells. Check sealing at every service and replace gaskets when disassembling components.
- Clean intake and valves (especially for GDI engines). In GDI, fuel does not wash intake valves, causing deposit buildup from crankcase gases. Cleaning every 37,000–50,000 miles (60,000–80,000 km) by media blasting, walnut shell blasting, or approved chemical cleaners may be recommended. For MPI engines, it is less critical but can be beneficial after more than 93,000 miles (150,000 km).
Related codes and their meanings
Error P0303 often accompanies related codes that clarify the problem’s nature:
| Code | Description | What to check |
|---|---|---|
| P0300 | Random/multiple cylinder misfires | General issues: fuel quality, pressure, air leaks, ignition problems on multiple cylinders |
| P0301 | Misfire in cylinder 1 | Same components as P0303 but for cylinder 1 |
| P0302 | Misfire in cylinder 2 | Same components as P0303 but for cylinder 2 |
| P0304 | Misfire in cylinder 4 | Same components as P0303 but for cylinder 4 |
| P0171 | Lean mixture (Bank 1) | Air leak, low fuel pressure, clogged injectors, faulty MAF/O2 sensor |
| P0172 | Rich mixture (Bank 1) | Stuck injector, high fuel pressure, faulty regulator, O2 sensor |
| P0316 | Misfires during startup (first 1000 revolutions) | Starter, compression, timing, spark plugs |
Interpretation of combinations:
- P0300 + P0303—multiple misfires with emphasis on cylinder 3: possible general cause (bad fuel, low pressure), but cylinder 3 is affected more (e.g., clogged injector).
- P0303 + P0171—misfires in cylinder 3 plus lean mixture: air leak near cylinder 3 intake or clogged injector 3.
- P0303 + P0172—misfires plus rich mixture: stuck injector 3 (excess fuel flooding the spark plug).
Disclaimer:
Information is for educational purposes only and does not replace professional vehicle inspection and repair. Numerical norms, thresholds, and specifications depend on the specific vehicle model—always consult the official owner’s manual. For serious faults (flashing Check Engine, low compression, suspected engine damage), contact a certified repair facility. The author and DecodeAuto are not responsible for consequences of self-repair.
Frequently asked questions
Is it possible to drive with the P0303 error?
A short trip to the repair shop (3–6 miles (5–10 km)) is allowed provided that the Check Engine light is steady (not flashing), the engine runs relatively smoothly, and there is no strong vibration or power loss. If the indicator is flashing, driving is strictly prohibited—stop and call a tow truck. Prolonged operation with misfires can lead to catalytic converter damage and engine failure.
Will the error reset itself after the fault is fixed?
Yes, but not immediately. After repair, the P0303 code moves from active memory to history after several successful drive cycles without misfires. Depending on the vehicle and monitor logic, it may take multiple warm-up cycles for the code history to clear completely if the problem does not recur. The Check Engine light will usually turn off after several successful monitoring cycles. The code can be cleared faster manually using a scanner.
By Daniel Brooks
I'm an automotive diagnostics and electronic systems engineer who explains car operation from the ECU's logic, rather than through dry code decoding. My approach is to demonstrate how the ECU makes decisions, what signals it compares, and why the same error can mean different things.