The information provided is general and does not replace professional consultation.
“Most people see the P0172 code and immediately think of a faulty oxygen sensor or MAF. But in reality, this code is not a diagnosis, but a symptom. It signals that the PCM detects too much fuel in the mixture and cannot compensate with standard corrections. Understanding why the control unit decided to store this code is key to accurate diagnosis and repair, rather than replacing parts by trial and error.”
– Daniel Brooks, DecodeAuto
Page contents
What does P0172 (DTC P0172) mean: system too rich (Bank 1)
Code P0172 is a diagnostic trouble code (DTC) indicating that the powertrain control module (PCM) has detected an overly rich air-fuel mixture in the first cylinder bank (Bank 1). The code appears along with the Check Engine light when the fuel-to-air ratio exceeds acceptable limits and fuel trims can no longer correct the condition.
How the PCM determines a “rich mixture”:
The PCM continuously analyzes data from the upstream oxygen sensor (O2 sensor) and the mass airflow sensor (MAF). The ideal air-fuel ratio is 14.7:1 (stoichiometric mixture). If the oxygen sensor shows low oxygen content in the exhaust gases (voltage >0.8V), it means there is too much fuel.
The PCM attempts to compensate for richness through fuel trims:
- STFT (Short Term Fuel Trim) – short-term correction, reacts instantly several times per second.
- LTFT (Long Term Fuel Trim) – long-term correction, averages changes over time.
Negative STFT and LTFT values (e.g., -15% or lower) indicate the PCM is reducing fuel delivery to restore the mixture. However, if the richness is caused by a physical fault (leaking injectors, high fuel pressure, faulty sensor readings), standard trims are insufficient. When long-term trim exceeds limits (usually consistently below -15 to -20%), the PCM stores code P0172 and triggers the Check Engine light.
Note: Thresholds for storing the code depend on the specific control module strategy and vehicle manufacturer. Always refer to your vehicle’s service information.
Quick checklist: immediate actions
If your Check Engine light comes on with code P0172, here are the first steps to quickly narrow down the problem:
- Connect an OBD-II scanner with Live Data capability and read trouble codes, including Freeze Frame (conditions when the code was stored).
- Check fuel trims STFT and LTFT: if they are consistently below -15%, this confirms a rich mixture.
- Visually inspect the air filter, intake tract, vacuum hoses, and crankcase ventilation system (PCV) for contamination, leaks, or unmetered air leaks.
- Measure fuel pressure at the rail with a gauge and compare it to factory specifications (see the manufacturer’s service information).
- Evaluate the operation of the upstream oxygen sensor (Bank 1, Sensor 1): check response speed and reaction to mixture changes.
- If an LPG/CNG system is installed, temporarily switch to gasoline and repeat the checks; if the code disappears, focus on gas system tuning.
| Action | Tool | Standard/Expected | Result |
|---|---|---|---|
| Read DTCs | OBD-II scanner | P0172 + possible related codes (P0175, P0101) | Confirmation of rich mixture on Bank 1 |
| Check STFT/LTFT | OBD-II scanner (Live Data) | LTFT/STFT ±5–10% (normal) | LTFT < -15% → rich condition |
| Inspect intake and filter | Visual inspection | No contamination, leaks, or restrictions | Dirty filter/restrictions → rich mixture |
| Measure fuel pressure | Fuel pressure gauge | According to manufacturer specs | High pressure → possible regulator fault |
| Check oxygen sensor | Multimeter/Scanner | Fluctuations 0.1–0.9V, fast response | Voltage stuck >0.8V → possible sensor issue or actual rich condition |
| LPG/CNG test (if installed) | Switch to gasoline | Code disappears on gasoline | Issue in gas map or reducer settings |
“In many cases, P0172 is related to incorrect fuel trims due to MAF or oxygen sensor issues, and less often to fuel rail pressure. The first thing I do is check Freeze Frame and fuel trims. This immediately rules out many possibilities.”
– Daniel Brooks, DecodeAuto
Symptoms accompanying code P0172
Symptoms and signs of code P0172
A rich air-fuel mixture manifests through characteristic symptoms that are hard to miss. The main signs of richness are:
- Check Engine light on (may flash during severe misfires).
- Increased fuel consumption – the vehicle noticeably uses more fuel than usual.
- Black smoke from the exhaust – unburned fuel creates soot visible as thick dark exhaust.
- Strong gasoline smell – especially noticeable behind the vehicle or under the hood; unburned fuel enters the exhaust system and can also dilute engine oil.
- Unstable idle – fluctuating RPM, engine misfires, or runs unevenly.
- Loss of power and hesitation during acceleration – excess fuel disrupts combustion, making the engine sluggish, especially under load.
- Hard hot start – flooded spark plugs due to richness make starting a warm engine difficult.
Why this happens: excess fuel reduces combustion efficiency. The stoichiometric ratio (14.7:1) is disturbed – too much fuel, too little oxygen. Some fuel does not burn in the cylinders and enters the exhaust, where it burns on hot catalytic surfaces or exits as black smoke and unburned hydrocarbons (HC). Fuel dilution of engine oil accelerates engine wear.
Main causes of code P0172
A rich air-fuel mixture arises from three groups of causes: sensor faults (the PCM receives false data), fuel system issues (physical fuel excess), and PCM software issues (incorrect adaptations or firmware). Below is an analysis of causes from most likely to rare, with methods of checking and solutions.
| Cause | Sign | How to check | Tool | Likelihood |
|---|---|---|---|---|
| Faulty upstream oxygen sensor | Voltage stuck >0.8V, slow response | Check O2 signal graph in Live Data | OBD scanner, multimeter | High |
| Dirty/faulty MAF | Underreported airflow | Compare MAF readings to normal for RPM | OBD scanner, MAF cleaner | High |
| High fuel pressure | Pressure above spec | Measure rail pressure with gauge | Fuel pressure gauge | Medium |
| Leaking injectors | Gasoline smell, black deposits on plugs | Injector balance test, injector leak test | OBD scanner, stethoscope | Medium |
| Stuck-open EVAP valve | Unstable idle | Check purge valve operation | Visual inspection, scanner | Low |
| Incorrect IAT/ECT readings | Low intake/coolant temperature | Compare IAT and ECT to ambient temperature | Multimeter, scanner | Medium |
| PCM adaptation or firmware fault | Consistently negative LTFT without physical cause | Reset adaptations, check for TSBs | OBD scanner, PCM software update | Low |
Sensor faults as a cause of rich mixture
Sensors are the “eyes and ears” of the PCM. If they transmit incorrect data, the control module makes incorrect fuel delivery decisions.
Oxygen sensor (O2 sensor)
The upstream oxygen sensor (Bank 1, Sensor 1) measures residual oxygen in exhaust gases and tells the PCM whether the mixture is rich or lean. A faulty oxygen sensor may “stick” at rich readings (voltage above 0.8V) or respond slowly.
What happens: the PCM sees a constant “rich” signal and starts reducing fuel delivery through negative trims (STFT/LTFT). But if the sensor is inaccurate, the actual mixture may be normal or even lean, while the PCM continues to trim fuel down. When trims reach the limit, code P0172 is stored.
How to check:
- Connect an OBD scanner and open Live Data for the upstream oxygen sensor (O2 Bank 1 Sensor 1).
- On a warmed-up engine, a normal narrowband sensor should switch rapidly between 0.1–0.9V several times per second.
- If voltage is “stuck” above 0.8V or switches slowly (less than once every 2 seconds), the sensor may be faulty.
- Additionally, check the sensor heater circuit with a multimeter (typically battery voltage at the connector with the ignition on, depending on the circuit design).
Important for wideband A/F sensors: Modern vehicles may use wideband air-fuel ratio sensors that operate differently and report data not in volts (0.1–0.9V) but in lambda coefficient or milliamps. Typical range: lambda ~1.0 (stoichiometric), current ~0 mA. When diagnosing, check the “AFR” or “Lambda” parameter in Live Data and compare it with OEM specifications.
Solution: replace the upstream oxygen sensor if testing confirms it is faulty.
MAP (manifold absolute pressure sensor)
The MAP sensor measures intake manifold pressure and helps the PCM calculate engine load. If the MAP shows excessive pressure (or low vacuum), the PCM may interpret the load as higher than actual and enrich the mixture.
What happens: incorrect MAP data → PCM delivers more fuel → mixture becomes rich → LTFT goes negative → P0172.
How to check:
- At idle, MAP usually shows low absolute pressure (high vacuum), about 30–40 kPa. Note: exact value depends on engine displacement and vacuum level. Check the OEM service information.
- When pressing the accelerator sharply, pressure should quickly rise to atmospheric (~100 kPa at sea level).
- Compare MAP readings with barometric pressure (usually available in Live Data as BARO).
- If MAP readings do not correspond to RPM and load, check the connector, vacuum hose, and reference voltage (usually 5V).
Solution: clean the connector, replace the vacuum hose, or replace the MAP sensor.
MAF (mass airflow sensor)
The MAF sensor measures the amount of air entering the cylinders. A dirty or faulty MAF underreports airflow → the PCM “thinks” there is less air → enriches the mixture.
How to check:
- At idle, MAF readings are usually between 2–7 g/s (depending on engine size). A rule of thumb: about 1 g/s per liter of engine displacement at idle. For example, for a 2.0L engine – about 2–3 g/s. At full load (WOT), MAF flow increases significantly. Always refer to OEM data for your specific engine.
- Underreported readings or no response to RPM changes indicate contamination or a fault.
Solution: clean the MAF sensor with a dedicated cleaner or replace it.
IAT (intake air temperature sensor)
The IAT sensor measures the temperature of intake air. Cold air is denser → contains more oxygen → requires more fuel. If the IAT shows a lower temperature than actual (e.g., 14°F (-10°C) when the real temperature is 68°F (20°C)), the PCM enriches the mixture as if for a cold start.
What happens: incorrect temperature → excess fuel → rich mixture → P0172.
How to check:
- Compare IAT readings with actual air temperature (you can use ECT – coolant temperature – for comparison on a cold engine).
- On a warmed engine, IAT and ECT should not both be close to ambient temperature; compare sensor readings to actual conditions and OEM data.
- Check IAT sensor resistance with a multimeter: it should correspond to temperature. Note: resistance specs depend on sensor type. Use the OEM resistance-temperature chart for accurate diagnosis.
Solution: replace the IAT sensor or clean its connector.
Fuel system issues: pressure, injectors, regulator
The fuel system can cause physical fuel excess that the PCM cannot compensate for with trims.
High fuel pressure occurs due to a faulty pressure regulator (stuck closed) or clogged return line. The result is injectors delivering more fuel than needed.
How to check:
- Connect a gauge to the fuel rail (usually via a Schrader valve).
- Start the engine and measure pressure at idle.
- Note: fuel pressure specs vary greatly depending on system type (return or returnless) and vehicle model. Always refer to manufacturer specifications. Do not use generic numbers without confirmation.
- If pressure is above spec, check the regulator: disconnect the vacuum hose (if present) – pressure should typically rise by about 4.4–7.3 psi (0.3–0.5 bar).
Solution: replace the fuel pressure regulator or repair the return line as needed.
Leaking injectors are injectors that do not close fully or drip after engine shutdown. Fuel continues to enter the cylinders, flooding plugs and creating a rich mixture at startup.
Signs:
- Hard hot start (flooded plugs).
- Gasoline smell from the exhaust.
- Black deposits on spark plugs.
How to check:
- Perform an injector balance test with a scanner, if supported.
- Conduct a leak test: measure fuel pressure in the rail after engine shutdown. Note: pressure drop thresholds depend on the system and there is no universal standard. Follow the manufacturer’s test procedure.
- Visually inspect injectors for fuel leaks around sealing rings.
Solution: ultrasonic cleaning of injectors, replacement of sealing rings, or injector replacement.
Faulty EVAP purge valve – valve stuck open, allowing fuel vapors from the charcoal canister to enter the intake manifold continuously, enriching the mixture.
Signs:
- Unstable idle.
- Consistently negative LTFT.
- Gasoline smell under the hood.
How to check:
- Listen for valve clicking during engine operation (it should open and close on PCM command).
- Disconnect the vacuum hose from the valve to the intake manifold; if RPM stabilizes, the valve may be leaking.
Solution: replace the EVAP purge valve.
Fuel trims and PCM faults
Fuel trims represent the percentage by which the PCM adjusts the base fuel map to maintain the stoichiometric mixture (14.7:1). There are two types:
- STFT (Short Term Fuel Trim) – short-term correction, reacts instantly several times per second based on oxygen sensor data.
- LTFT (Long Term Fuel Trim) – long-term correction, averages STFT over time and is stored in the PCM’s adaptive memory.
How to interpret values:
- Positive values (e.g., +10%) – the PCM adds fuel; the mixture was lean.
- Negative values (e.g., -15%) – the PCM reduces fuel; the mixture is rich.
What P0172 means in fuel trim context:
If LTFT + STFT are consistently below -15 to -20%, it indicates the PCM is constantly trying to reduce fuel delivery, but a physical cause (leaking injectors, high pressure, faulty sensors) prevents restoring the mixture. When trims reach the limit, the PCM stores P0172.
PCM adaptation faults:
After repairs (sensor, injector, regulator replacement), the PCM may retain old adaptive values in memory. For example, if injectors leaked before and LTFT was -20%, after replacement the PCM may still trim fuel down based on old data, causing a lean condition. In such cases, an adaptation reset may be required (procedure depends on vehicle make and model; usually via a scanner).
Firmware issues:
Rarely, the base fuel map in the PCM may be incorrect (factory issue or unsuccessful tuning). Check for technical service bulletins (TSBs) for your model – the manufacturer may have released software updates.
| Parameter | Normal | At P0172 | Interpretation |
|---|---|---|---|
| STFT | ±5–10% | < -10% consistently | PCM reduces fuel → rich mixture |
| LTFT | ±5–10% | < -15…-25% | Persistent richness |
| O2 sensor (V) | 0.1–0.9V (fluctuations) | >0.8V (stuck) | “Rich” signal, possible sensor fault |
| MAF (g/s) | ~1 g/s per liter at idle (see OEM data) | Underreported readings | PCM “thinks” air is low → enriches |
| Fuel pressure | According to manufacturer specs | Above spec | Fuel excess due to regulator/return line |
Specifics of P0172 on vehicles with LPG/CNG
Vehicles equipped with liquefied petroleum gas (LPG) or compressed natural gas (CNG) systems have specific causes for P0172. Most often, a rich mixture on gas is related to incorrect gas map calibration, excessive gas pressure in the reducer, or worn gas injectors.
Typical causes on LPG/CNG:
- Incorrect gas map calibration: gas injector opening time does not match actual airflow → too much gas delivered.
- Excessive pressure in the reducer: a worn diaphragm or incorrect adjustment increases gas flow. Note: gas pressure range depends on the LPG system type (generation, manufacturer). Always refer to the LPG system manual.
- Worn gas injectors: injectors leak or do not close fully.
- Incorrect synchronization with the gasoline system: if fuel trims on gasoline and gas are not coordinated, the PCM continues to adjust the mixture based on gasoline-mode data.
How to check:
- Switch to gasoline: if P0172 disappears or LTFT returns to normal, the problem likely lies in the LPG settings.
- Check gas pressure: connect a gauge to the reducer; exact specs are in the reducer manual.
- Check gas injectors: perform a balance test using diagnostic software (Stag, Digitronic, AEB, etc.).
- Check the gas system for leaks: gas leaks can contribute to a rich condition.
Solution:
- Adjust gas map calibration at a specialized LPG repair shop.
- Replace the reducer diaphragm or adjust pressure.
- Clean or replace gas injectors.
- Synchronize fuel trims on gasoline and gas.
- After repairs, reset PCM adaptations and relearn the system.
Step-by-step diagnosis of P0172
Diagnosing P0172 involves sequentially checking the conditions that led to a rich mixture. Below is a step-by-step process for car owners with basic tools (OBD scanner, multimeter, pressure gauge).
Step 1: Read codes and Freeze Frame
Action: Connect an OBD-II scanner with Live Data.
What to check:
- Code P0172 and possible related codes (P0175 – Bank 2, P0101 – MAF, P0420 – catalyst).
- Freeze Frame – conditions when the code was stored (RPM, temperature, load, fuel trims).
- Current STFT and LTFT values for Bank 1.
How to interpret Freeze Frame:
Freeze Frame is a “snapshot” of engine parameters at the moment the code was stored. Typical fields: RPM, ECT (coolant temp), IAT (intake air temp), Load, MAF (airflow g/s), MAP (absolute pressure kPa), O2 B1S1 (upstream O2 voltage), STFT/LTFT (% fuel trims).
Interpretation examples:
- Scenario 1 (idle only): LTFT -18% + STFT -8% at idle (RPM ~800), O2 0.85V → likely physical richness; first check Step 4 (fuel pressure, injectors).
- Scenario 2 (under load): LTFT -12% + STFT -15% at RPM 2500, Load 60%, MAF underreported → check MAF (Step 6).
- Scenario 3 (cold start): LTFT -20%, ECT 50°F (10°C), IAT 23°F (-5°C) → check IAT/ECT (Step 6).
Decision criteria:
- If LTFT < -15…-20% consistently at idle and under load → proceed to Step 2.
- If LTFT is normal (±5–10%) but the code is present, check code history; the problem may have been temporary.
Step 2: Visual inspection of intake and smoke test
Action: Inspect the air filter, intake manifold, vacuum hoses, and crankcase ventilation system (PCV).
What to check:
- Air filter: heavy contamination can reduce airflow and contribute to a rich condition.
- Intake tract: cracks, torn hoses, restricted ducting, unsealed connections.
- Vacuum hoses: disconnected or damaged hoses can affect MAP readings and system operation.
- PCV system: a clogged PCV can cause excess crankcase pressure → oil and fuel vapors enter the intake → mixture may become richer.
Smoke test method:
If visual inspection is clear, perform a smoke test to detect leaks:
- Introduce smoke through the PCV port or intake hose using a smoke machine.
- Normal: no smoke escaping outside (all connections sealed).
- Any smoke at joints/hoses – repair as needed, clear codes, drive 9–12 miles (15–20 km), and check whether LTFT returns to about ±5–10%.
Decision criteria:
- If leaks or contamination are found, fix them, reset the code, and test drive.
- If everything looks normal → Step 3.
Step 3: Check oxygen sensors (Bank 1, Sensor 1) and downstream O2 (B1S2)
Action: Check the upstream oxygen sensor with a multimeter or OBD scanner.
What to check:
- Sensor voltage (Live Data): on a warmed engine, a narrowband sensor should switch rapidly between 0.1–0.9V (about 1–2 times per second).
- Voltage stuck high: if voltage is “stuck” above 0.8V, verify whether the engine is actually running rich before condemning the sensor.
- Sensor heater: check heater voltage (typically battery voltage with the ignition on, depending on the circuit design).
Additional B1S2 check (downstream O2):
Downstream O2 sensor (after the catalyst) helps validate the diagnosis and check catalyst condition:
- Stable high voltage B1S2 during a rich condition and little change during brief lean events → possible catalyst fuel saturation; check for code P0420.
- If B1S2 mimics B1S1 behavior → suspect reduced catalyst efficiency.
Decision criteria:
- If voltage is stuck >0.8V or switching is slower than once every 2 seconds, verify the sensor and circuit before replacement.
- If the sensor works normally → Step 4.
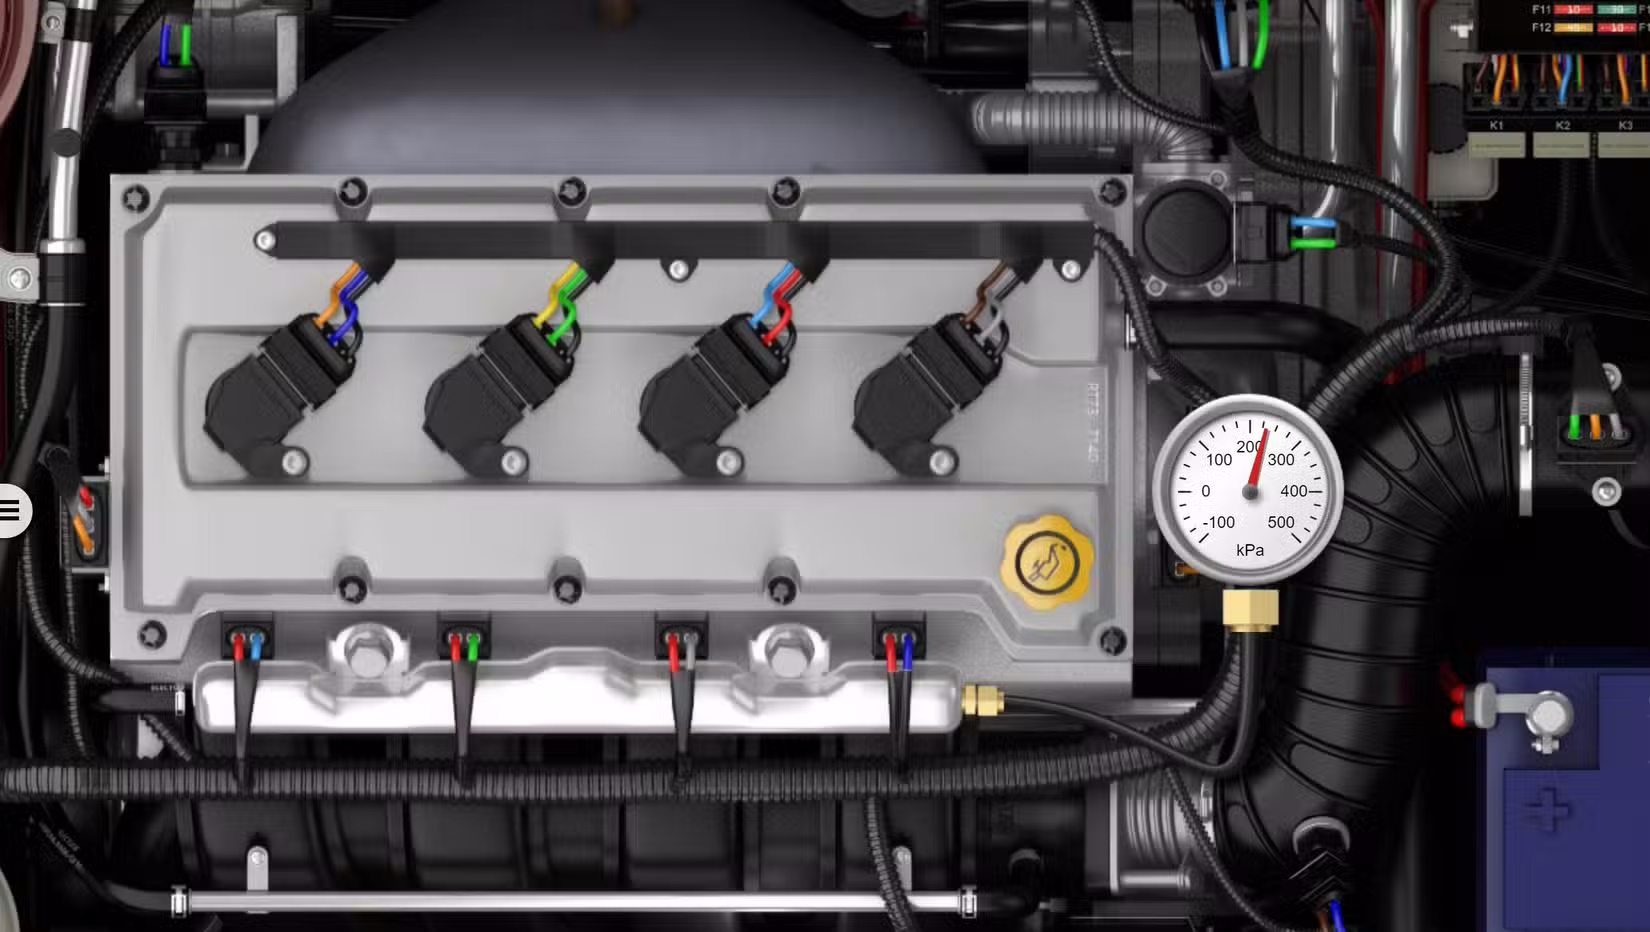
Step 4: Check fuel pressure
Action: Connect a gauge to the fuel rail test port.
Safety precautions when working with the fuel system:
Before connecting the gauge:
- Relieve fuel pressure via the service port or by removing the fuel pump fuse/relay and cranking the engine.
- Work outdoors or in a well-ventilated area.
- No open flames or sparks nearby; have rags ready to catch fuel.
What to check:
- Idle fuel pressure: compare it to factory specs. Always refer to the OEM service information for your vehicle.
- Pressure regulator: if the system has a return line, disconnect the vacuum hose from the regulator – pressure should typically rise by about 4.4–7.3 psi (0.3–0.5 bar).
Decision criteria:
- If pressure is above spec → check the regulator, return line, and fuel pump.
- If pressure is normal → Step 5.
Step 5: Check injectors
Action: Perform an injector balance test (if the scanner supports it) or visually inspect injectors and spark plugs.
What to check:
- Balance test: compare injector performance under identical conditions; significant variation may indicate a fault.
- Visual inspection: fuel leaks around sealing rings, black deposits on plugs (a sign of richness).
- Leak test: measure fuel pressure in the rail after engine shutdown; rapid pressure drop may indicate injector leakage (follow the manufacturer procedure).
Decision criteria:
- If injectors leak or the balance test indicates a problem → clean the injectors on a bench or replace them.
- If injectors are normal → Step 6.
Step 6: Check MAF/MAP/IAT sensors
Action: Check the readings of the mass airflow (MAF), manifold absolute pressure (MAP), and intake air temperature (IAT) sensors.
What to check:
- MAF: at idle, readings are usually ~1 g/s per liter of engine displacement (e.g., 2.0L → ~2–3 g/s). At full load (WOT), flow is much higher. Always refer to OEM data. Underreported readings → PCM enriches the mixture.
- MAP: at idle, usually low absolute pressure (high vacuum); the exact value depends on engine size and vacuum level. Pressure should rise to ~100 kPa (atmospheric at sea level) when the throttle is opened sharply. Check the OEM service information.
- IAT: compare it to actual air temperature (ECT can be used on a cold-soaked engine as a rough reference).
For wideband A/F sensors:
If the vehicle has wideband air-fuel ratio sensors, check the “AFR” or “Lambda” parameter in Live Data. Typical norm: lambda ~1.0 (stoichiometric). Deviations indicate problems similar to narrowband sensors.
Decision criteria:
- If the MAF underreports → clean the MAF sensor with a dedicated cleaner or replace it.
- If MAP/IAT show incorrect values → check connectors and reference voltage (5V), then replace the sensor if needed.
- If all sensors are normal → Step 7.
Step 7: Check EVAP system
Action: Check the EVAP purge valve.
What to check:
- Valve operation: it should click (open/close on PCM command) during engine operation.
- Sealing: disconnect the vacuum hose from the valve to the intake manifold; if RPM stabilizes, the valve may be stuck open.
Additional scanner diagnostics:
Command the EVAP valve (purge duty cycle 20–30%):
- Normal: a brief change in fuel trims may be seen, depending on system operation.
- If enrichment or no reaction is observed, check the valve and hoses.
Decision criteria:
- If the EVAP valve leaks → replace the valve.
- If the valve is normal → Step 8.
Step 8: Reset adaptations and test drive
Action: After fixing all issues, reset PCM adaptations.
How to reset adaptations:
- Via an OBD scanner (function “Reset adaptations” or similar).
- On some vehicles, disconnecting the negative battery terminal for 15–30 minutes may clear adaptive memory, but this is not the preferred method.
Test drive:
- Warm up the engine to operating temperature.
- Drive 9–12 miles (15–20 km) in various modes (idle, steady speed, acceleration).
- Check STFT and LTFT: they should return to normal (±5–10%).
- Read codes: P0172 should not return.
Methods to fix P0172 and repair
After diagnosis and narrowing down the cause, proceed with the repair. Below are typical solutions for each problem category.
| Problem | Fix | Time (hours) | Estimated parts cost (USD) |
|---|---|---|---|
| Faulty upstream oxygen sensor | Replace oxygen sensor Bank 1 Sensor 1 | 0.5–1.0 | $60–200 |
| Dirty MAF | Clean MAF sensor with dedicated cleaner | 0.2–0.3 | $10–15 (cleaner) |
| High fuel pressure | Replace pressure regulator, check return line | 1.0–2.0 | $50–150 |
| Leaking injectors | Ultrasonic cleaning or replacement | 1.5–3.0 | $40–120 (cleaning), $200–600 (set) |
| Stuck EVAP valve | Replace EVAP purge valve | 0.3–0.5 | $30–100 |
| Incorrect IAT/ECT readings | Replace intake air/coolant temperature sensor | 0.3–0.5 | $20–60 |
| PCM adaptation fault | Reset adaptations via scanner | 0.1–0.2 | Free (if DIY) |
| PCM firmware issues | Update PCM software (if a TSB is available) | 0.5–1.0 | $50–150 (dealer update) |
Prices are approximate and depend on vehicle make, region, and model year. Labor cost is based on local hourly rates.
Repair details
1. Replacing upstream oxygen sensor:
- Warm up the engine (the sensor is easier to remove).
- Disconnect the sensor connector.
- Remove the sensor with a special wrench (usually 22 mm with a slot for the wires).
- Install the new sensor; apply high-temperature anti-seize to the threads only if specified by the sensor manufacturer (avoid the sensing element).
- Reconnect the connector, clear codes, and verify operation.
2. Cleaning MAF sensor:
- Disconnect the MAF connector.
- Remove the sensor from the air duct (usually 2 screws or clips).
- Spray MAF cleaner on the sensing element (fine wire or film).
- Do not rub or touch it with your hands. Let it dry for 10–15 minutes.
- Reinstall, reconnect, and reset adaptations.
3. Replacing fuel pressure regulator:
- Relieve pressure in the rail (usually via the test port).
- Disconnect fuel lines from the regulator (prepare rags for fuel spillage).
- Remove the regulator from the rail.
- Install the new regulator with new seals.
- Check for leaks and measure pressure.
4. Injector cleaning on a bench:
- Remove the fuel rail with injectors.
- Take it to a specialized injector bench for ultrasonic cleaning plus spray pattern and flow testing.
- Reinstall with new seals.
- Check for leaks and reset adaptations.
5. Replacing EVAP valve:
- Locate the purge valve (usually on the engine or near the charcoal canister).
- Disconnect the electrical connector and vacuum hoses.
- Remove the old valve and install the new one.
- Reconnect everything and verify operation with a scanner.
6. Resetting PCM adaptations:
- Via scanner: find the “Reset adaptations” or “Clear learned values” function.
- Manually: disconnect the negative battery terminal for 15–30 minutes only if the vehicle supports this method (system initialization may be required afterward).
Platform specifics: GDI, turbo, flex-fuel
Modern engines with direct injection (GDI), turbocharging, and flex-fuel systems have their own P0172 diagnostic features.
GDI (direct injection) and high fuel pressure
Features:
- In GDI systems, fuel is injected directly into the cylinders at high pressure (typically much higher than port fuel injection; exact values vary by system).
- Fuel rail pressure sensor (HPFP): if the sensor reports incorrect data, the PCM may deliver excess fuel.
- Injector leaks under pressure: GDI injectors operate at very high pressure, and even small leaks can cause richness.
What to check first for P0172 on GDI:
- Check high-pressure fuel rail pressure via Live Data.
- Diagnose GDI injector condition (balance test, leak check).
- Check fuel pressure sensor accuracy.
Flex-fuel systems
Features:
- Flex-fuel engines run on gasoline-ethanol blends (E85).
- Fuel composition sensor: measures ethanol content. If faulty, the PCM may miscalculate fuel amount (ethanol requires a richer stoichiometric ratio of about 9.8:1 instead of 14.7:1).
What to check first for P0172 on flex-fuel:
- Check fuel composition sensor readings (usually “Ethanol Content %” in Live Data).
- Compare with the actual fuel blend.
- If the sensor is faulty – replace it.
Turbocharged engines
Features:
- Turbo engines operate with increased intake pressure.
- MAP/MAF interpretation under boost: MAP may show >100 kPa (positive pressure), and MAF shows increased airflow. This is normal for turbo engines.
- What to check first for P0172 on turbo:
- Check intercooler and boost pipe seals (leaks can affect MAF/MAP correlation).
- Check wastegate valve and boost controller operation.
- Check fuel pressure under load (turbo engines require stable fuel pressure).
Definitions and important notes
What is Bank 1 and how it differs from Bank 2 (P0175)
Bank 1 is the cylinder bank containing cylinder #1. For inline engines (e.g., 4-cylinder or inline-6), there is only one bank – Bank 1. For V engines (V6, V8), Bank 1 is the side with cylinder #1, and Bank 2 is the opposite side.
How to identify Bank 1:
- Locate cylinder #1 according to the service manual.
- Check the exhaust manifold: the upstream oxygen sensor for Bank 1 is installed in that bank’s manifold.
Difference between P0172 and P0175:
- P0172 – rich mixture on Bank 1.
- P0175 – rich mixture on Bank 2.
If both codes appear simultaneously, the problem is likely common (MAF, fuel pressure, EVAP valve), not localized to one bank.
How the PCM determines a “rich mixture”
The PCM determines richness via the upstream oxygen sensor (Bank 1 Sensor 1). The sensor measures residual oxygen in the exhaust:
- High oxygen (voltage <0.3V) → lean mixture.
- Low oxygen (voltage >0.8V) → rich mixture.
With a constant “rich” signal, the PCM reduces fuel delivery via negative fuel trims (STFT/LTFT). If trims reach the limit and the mixture remains rich, the PCM stores P0172 and turns on the Check Engine light.
Impact of P0172 on catalyst and engine
Prolonged operation with a rich mixture leads to serious consequences:
1. Catalytic converter damage:
Unburned fuel enters the exhaust and burns on the catalyst surface, causing:
- Localized overheating of the ceramic substrate above 1832°F (1000°C).
- Melting and destruction of the catalyst substrate.
- Reduced exhaust cleaning efficiency → code P0420 (catalyst efficiency below threshold).
2. Engine oil dilution:
Excess fuel washes oil film from the cylinder walls and enters the crankcase, diluting engine oil. This accelerates wear of piston rings, connecting rod bearings, and main bearings.
3. Accelerated spark plug wear:
A rich mixture causes black deposits on plugs, leading to misfires and power loss.
Conclusion: driving with P0172 is only advisable for a short time (for example, to the nearest repair shop). Prolonged use risks costly catalyst and engine repairs.
Common mistakes during diagnosis
When diagnosing P0172, beginners often make errors leading to unnecessary part replacements and delayed repairs. Below are the top typical mistakes.
1. Replacing the oxygen sensor without checking fuel trims and pressure:
Many see P0172 and immediately replace the upstream oxygen sensor. But if the problem is leaking injectors or high fuel pressure, sensor replacement won’t help – the code will return.
2. Ignoring the EVAP system:
A stuck-open EVAP purge valve is a common but overlooked cause of P0172. Without checking EVAP, the fuel system is often blamed incorrectly.
3. Not checking the MAF:
A dirty MAF sensor underreports airflow → the PCM enriches the mixture. Cleaning the MAF with dedicated cleaner often solves the problem for $10 and a few minutes of work.
4. Updating software “blindly” without fixing mechanical causes:
Updating PCM software or tuning without diagnosing physical faults is a waste of time and money. Fix the cause first, then reset adaptations.
5. No test drive and no recheck of LTFT/STFT after repair:
After repair, always drive 9–12 miles (15–20 km) in various modes and check fuel trims. If LTFT does not return to normal, the problem is either unresolved or secondary faults exist.
6. Replacing parts without reading Freeze Frame:
Freeze Frame shows conditions when the code appeared (RPM, load, temperature). Ignoring this data often leads to incorrect diagnosis.
Prevention
Preventing P0172 involves maintaining the fuel system and sensors in good condition. Regular checks help avoid costly repairs.
Recommended maintenance schedule:
| Item | Interval | Note |
|---|---|---|
| Air filter | 9,000–12,000 miles (15,000–20,000 km) | More frequent in dusty conditions |
| Fuel filter | 18,000–25,000 miles (30,000–40,000 km) | For gasoline engines; diesel may be more frequent |
| MAF check | 18,000–25,000 miles (30,000–40,000 km) | Clean if necessary |
| Fuel pressure check | 18,000–25,000 miles (30,000–40,000 km) | Preventive gauge check |
| Injector cleaning | 37,000–50,000 miles (60,000–80,000 km) | Ultrasonic cleaning recommended |
| Oxygen sensor check | 50,000–62,000 miles (80,000–100,000 km) | Replace if response is slow |
| LPG calibration (if installed) | 12,000–18,000 miles (20,000–30,000 km) | Adjust gas map and check reducer |
Additional recommendations:
- Refuel with quality fuel at trusted stations.
- Avoid driving on very low fuel levels (sediment in the tank can clog the filter and injectors).
- Regularly check sensor connectors for oxidation and corrosion, which can distort signals.
Reference values
Typical reference values (verify with your vehicle’s manual):
| Parameter | Normal | Note/Engine dependency |
|---|---|---|
| STFT | ±5–10% | Short-term trim; deviations < -10% may indicate richness |
| LTFT | ±5–10% | Long-term trim; values below about -15% may contribute to P0172 |
| O2 sensor (V) | 0.1–0.9V (fluctuating) | Narrowband sensor; stuck >0.8V indicates richness |
| MAF at idle (g/s) | ~1 g/s per liter displacement | Depends on engine size; check OEM data |
| Fuel rail pressure | According to manufacturer specs | Check the OEM service information |
| IAT | Within about 9–18°F (5–10°C) of ambient temperature | Should generally be plausible relative to actual conditions |
| ECT | 185–203°F (85–95°C) | Cold engine should be near ambient temperature |
Ranges are typical; use exact values from your vehicle’s OEM service information. Using incorrect reference values may lead to misdiagnosis.
Quick guide: what to do now
- Connect an OBD scanner, read codes, and check Freeze Frame.
- Check fuel trims (STFT/LTFT): if < -15%, proceed with diagnosis.
- Inspect the air filter, intake, and vacuum hoses – fix contamination or restrictions.
- Check fuel pressure with a gauge (refer to the OEM service information).
- Test the oxygen sensor: if voltage is constantly >0.8V, verify whether the engine is actually rich before replacing the sensor.
- If LPG/CNG is installed, switch to gasoline and check whether the code disappears.
- After repair, reset PCM adaptations and perform a 9–12 mile (15–20 km) test drive.
Disclaimer: The information in this article is for educational purposes only and does not replace professional diagnosis and repair. Before performing any work, consult the manufacturer’s service information and follow safety procedures. DecodeAuto is not responsible for consequences of self-repair. If in doubt, consult a certified technician.
Frequently asked questions
1. Is it possible to drive with the P0172 code?
You can drive, but it is not recommended. Short trips to a repair shop are acceptable, but prolonged operation with a rich mixture can lead to catalytic converter damage (overheating, melting of the substrate), dilution of engine oil with gasoline (accelerated engine wear), and increased fuel consumption.
2. Will the code reset itself after the cause is fixed?
Not always. After fixing the fault, you should clear the codes using an OBD scanner, reset PCM adaptations if needed, and perform a verification test drive for 9–12 miles (15–20 km) in various modes. If the cause is eliminated, the code should not return. If it does, the problem is either unresolved or there is a secondary fault.
3. What is the difference between P0172 and P0175?
P0172 means a rich mixture on Bank 1 (the cylinder bank containing cylinder No. 1). P0175 means a rich mixture on Bank 2 (the second cylinder bank on V-type engines). If both codes appear simultaneously, the problem is likely common to both banks (MAF sensor, fuel pressure, EVAP valve). If only one appears, the problem may be localized to a specific bank.
4. Will disconnecting the battery terminal help?
Disconnecting the battery terminal may temporarily clear the code and reset PCM adaptations on some vehicles, but if the cause is not fixed, the code will return after several drive cycles.
5. Does P0172 affect the lifespan of engine oil and the engine?
Yes. Excess fuel dilutes the engine oil, reducing its viscosity and lubricating properties. This accelerates wear of piston rings and cylinder walls, connecting rod and main bearings, and valvetrain components. Additionally, carbon deposits on spark plugs and in the combustion chamber can worsen combustion and lead to misfires.